 |
 |
Home
Tools
Drilling and Fixing
Putting Things Up
Repairs/Maintenance
Plumbing
Electrics
Woodwork
Decorating a Room
Tiling
Safety & Security
Saving Energy
House and Finance
Health&Safety
Disclaimer
Contact
Advertising
Useful Links
Site Map
| Setting out your tiles | |||||||||||||||||||||||
Where to start tiling is very important so spend some time planning the layout of the tiles before you begin. A lot of walls in houses will not be parallel or square. The vertical corners may not be a perfect right angle with the horizontal. So if you start from one side or the very bottom your tiling may not end up square and not look good. By the time you get from one side of the room to the other the last tiles may be noticeably misaligned. With this in mind the way I like to do things is; |
|||||||||||||||||||||||
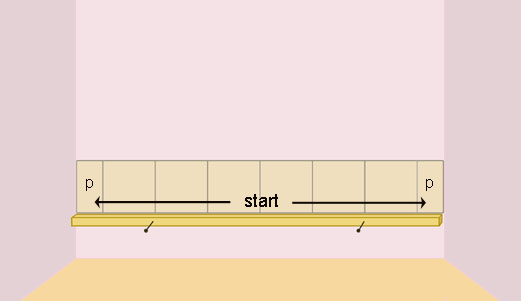
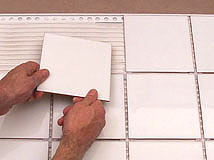
| Where to start tiling a wall | |||||||||||||||||||||||
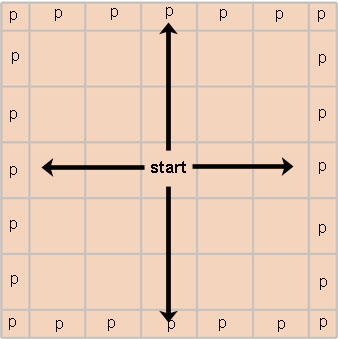
At a point low down, approx. ¾ the height of a tile from the bottom make a true horizontal using a laser level (or spirit level). Lightly nail a timber batten to the wall.This will be your start point and all other tiles will line with this Measure the mid-point between each corner.The aim is to start tiling in the middle along your timber batten and end at each side with a part tile. Try laying out your tiles on the batten to measure out the positioning, or you could mark the position on the batten. When you're happy you can apply the adhesive and lay the first tile. Once you've got the first row of tiles on the rest should follow nicely. Use tile spacers to get each tile line up perfectly. |
|||||||||||||||||||||||
| Tiling a wall p=part tile | |||||||||||||||||||||||
|
|||||||||||||||||||||||
| Tile spacers | |||||||||||||||||||||||
Where to start tiling in kitchens Above a work top you might just want to have several rows of tiles. Usually the work top will be fairly level so you can simply start with your first layer resting on the work top. If you are tiling between two corners start in the middle with whole tiles and work to the corners ending in part tiles |
|||||||||||||||||||||||
|
|||||||||||||||||||||||
Tiling above a work top
P= part tile w=whole tile |
|||||||||||||||||||||||
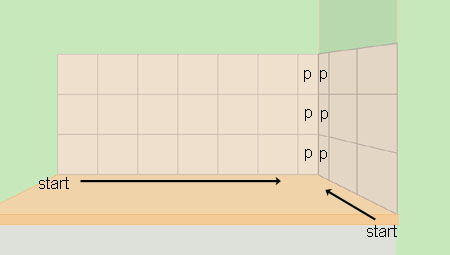 |
A simple L-shaped layout above a work top p=part tile |
||||||||||||||||||||||
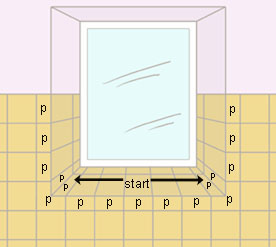
Tiling round a window recess |
 |
||||||||||||||||||||||
| p=part tile | |||||||||||||||||||||||
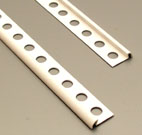
Edging strip The edges of some tiles are not made to be seen and so on outer corners they will look better with edging strip. This simply fits behind the tile and is held in place by the tile and adhesive. |
 |
 |
|||||||||||||||||||||
Where to start tiling floors Work out from the middle ensuring all full tiles are perfectly lined up and square. |
|||||||||||||||||||||||
 |
Plan view(from above) of floor tiling layout p=part tile |
||||||||||||||||||||||