 |
 |
Home
Tools
Drilling and Fixing
Putting Things Up
Repairs/Maintenance
Plumbing
Electrics
Woodwork
Decorating a Room
Tiling
Safety & Security
Saving Energy
House and Finance
Health&Safety
Disclaimer
Contact
Advertising
Useful Links
Site Map
| Lining paper tips | DIY - Decorating - Wallpapering a room with lining paper | ||||||||||||||||||||||||||||||
On poor quality walls in older houses you'll often find lining paper has been pasted up prior to painting. This provides a more even surface and so your walls should look much better than they would otherwise. |
|||||||||||||||||||||||||||||||
| If you are thinking of putting up a patterned wallpaper on a previously painted wall it is advisable to use lining paper first as a backing paper. This provides a much better surface to work on. | |||||||||||||||||||||||||||||||
| Repairing existing lining paper | |||||||||||||||||||||||||||||||
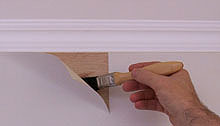
As lining paper ages, or if it's been badly applied, or if there has been some dampness, you may find it's starting to peel off in places. This can been repaired prior to painting. |
|||||||||||||||||||||||||||||||
It often starts to detach from next to the ceiling or skirting. To fix, carefully pull back the loose paper to the point where it's well attached. |
|||||||||||||||||||||||||||||||
 |
|||||||||||||||||||||||||||||||
 |
|||||||||||||||||||||||||||||||
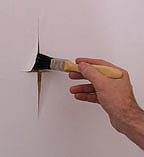
If it is coming away along the vertical lines between lining sheets you can't easily peel it back to get some paste inside. |
|||||||||||||||||||||||||||||||
 |
|||||||||||||||||||||||||||||||
 |
|||||||||||||||||||||||||||||||
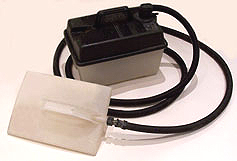
If the lining paper is so too bad you may have to remove it with a steam stripper and put up some new paper. |
|||||||||||||||||||||||||||||||
| Hanging new lining paper | |||||||||||||||||||||||||||||||
Hanging wallpaper to a high standard can be a bit tricky so I wouldn't particularly recommend a beginner to attempt hanging a patterned or floral wallpaper especially if it is a expensive one. Far better to leave it to the experts. But with lining paper you should be able to achieve good results as it's much more forgiving of little mistakes and of course you are going to paint over it. The aim is to try and make a good enough job so that when it's painted you can't tell the wall has been papered. |
|||||||||||||||||||||||||||||||
You'll need: |
|||||||||||||||||||||||||||||||
Lining paper...this comes in various thicknesses or weights 800(thin), 1000, 1200,1400, etc.(thicker). I tend to use the 1000-1200 The point of using lining paper is to create a better wall surface on which to paint. So the worse your old walls are the thicker the lining paper needs to be. |
|||||||||||||||||||||||||||||||
A pasting board.. A folding table especially for cutting and pasting |
|||||||||||||||||||||||||||||||
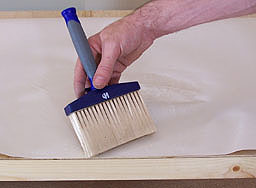
A pasting brush..large brush for pasting |
|||||||||||||||||||||||||||||||
A paper brush.to brush smooth the paper onto the walls |
|||||||||||||||||||||||||||||||
| A smoothing roller..... to smooth down edges. | |||||||||||||||||||||||||||||||
Papering scissors...very large scissors to cut nice straight lines. |
|||||||||||||||||||||||||||||||
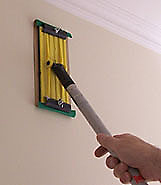
After removing any old paper with a steam stripper let the wall dry then sand off any residue or little lumps. It's much easier if you use a sanding plate on a pole |
 |
||||||||||||||||||||||||||||||
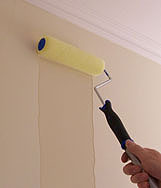
I always like to size the walls. This means applying glue size (a thin watery glue)with a roller or brush to prepare the surface which will allow the new lining paper to stick much better (NB a watered down wallpaper paste will work just as well. Read the instructions on the packet to tell you how to mix the strength right for this) |
 |
||||||||||||||||||||||||||||||
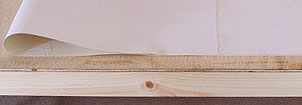
Cut 4 or 5 lengths of paper a few inches longer top and bottom of your wall Paste them all up on a pasting board. (you can buy a cheap folding pasting board for around £10). |
 |
||||||||||||||||||||||||||||||
| NB If when you come to paint the walls the paper starts to bubble up or peel at the joins then you've either not prepared the walls properly, or not applied enough paste all over the paper. | |||||||||||||||||||||||||||||||
Fold each end in on itself to meet in the middle then fold again. Leave to allow the paste to soak well in. Paste the other lengths and by the time you've done that the first will be ready to use. |
 |
||||||||||||||||||||||||||||||
| Hanging the paper | |||||||||||||||||||||||||||||||
I like to start my first piece slightly to one side of the rooms main window. Although this is usual when hanging patterned paper it's not strictly necessary for lining paper.
|
 |
||||||||||||||||||||||||||||||
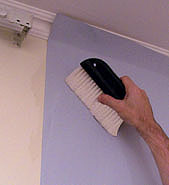
Unfold the top piece of paper and hold it up to the wall slightly overlapping the top. Use the brush to smooth it down and get rid of any air pockets Unfold the bottom half and do the same. Make sure you brush the paper right into the edges between the wall/ceilng and wall/skirting |
 |
||||||||||||||||||||||||||||||
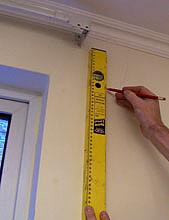
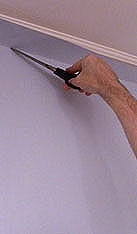
Score the top and bottom where it meets the ceiling/skirting with the back of your scissors. Gently pull the paper from the wall and cut along the score line. Then smooth back down. Carry on around the room. Where you meet corners and objects like door frames etc. brush the paper right into the join. Then score, peel back to cut, and finally smooth back down. |
 |
 |
|||||||||||||||||||||||||||||
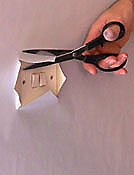
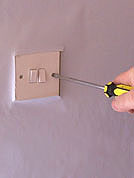
Papering around switches/ socket. Unscrew the switch without removing it completely just enough so you can get the paper behind it. Smooth the paper down then tighten up the screws |
 |
 |
|||||||||||||||||||||||||||||
Lining paper tips As you apply each piece try to avoid any slight over laps as this will really show up badly and detract from the final look, and once you done it there's not much you can do about it. If you end up leaving tiny gaps that's not such a problem as this will fill with paint or you could even fill it with lightweight easy sand filler Don't worry too much about any tears or rips you may get as you go round fiddly areas these can be smoothed down, but try to avoid over laps as you do smooth the tears down. |
|||||||||||||||||||||||||||||||
| Lining paper tips 2 Occasionally when going round tricky areas you may end up having to join two pieces of lining paper together which would otherwise have a large overlap. Rather than leave an unsightly overlap you can achieve a perfect join by cutting through both pieces on the wall with a very sharp stanley knife. It doesn't even have to be dead straight as the under piece will be exactly the same as the upper piece. Simply peel back the top piece to reveal the surplus under piece. You should be able to peel this off if you have cut right through both bits. Then smooth back down the two pieces for a perfect join! |
|||||||||||||||||||||||||||||||
If you done a good job of the papering you shouldn't be able to tell that the wall has paper on it when you've painted it!! |
|||||||||||||||||||||||||||||||
Painting lining paper |
|||||||||||||||||||||||||||||||